How to Examine Declassified Apollo 12 Mission Photos for Anomalous Lights
Introduction
In late 2023, a batch of declassified images from NASA's Apollo 12 mission (November 1969) was released, revealing curious bright spots on the lunar surface that astronauts Charles Conrad and Alan Bean reported seeing during their moonwalk. These unidentified lights—often called lunar transient phenomena—sparked debate among space enthusiasts and researchers. This guide will walk you through how to access, view, and analyze those same declassified photos so you can form your own conclusions about what those mysterious lights might be.
What You Need
- Internet connection (broadband recommended for large image files)
- A computer or tablet with a web browser
- Image viewing software (any standard photo viewer; optional: photo editing software like GIMP or Photoshop for contrast adjustments)
- PDF reader (for scanning the Apollo 12 mission reports)
- Notepad or document app for recording observations
- Basic understanding of lunar photography (helpful but not required)
Step-by-Step Guide
Step 1: Locate the Official Declassified Image Archive
The declassified Apollo 12 images are housed on the Lunar and Planetary Institute (LPI) website and the NASA Image and Video Library. Begin by visiting LPI's Apollo Image Atlas. Look for the Apollo 12 mission folder—usually labeled Apollo 12 (AS12-68) or similar. Many of the controversial frames are from the Apollo 12 70mm Hasselblad camera used during surface operations.
Step 2: Identify the Specific Frames Cited in the Declassified Reports
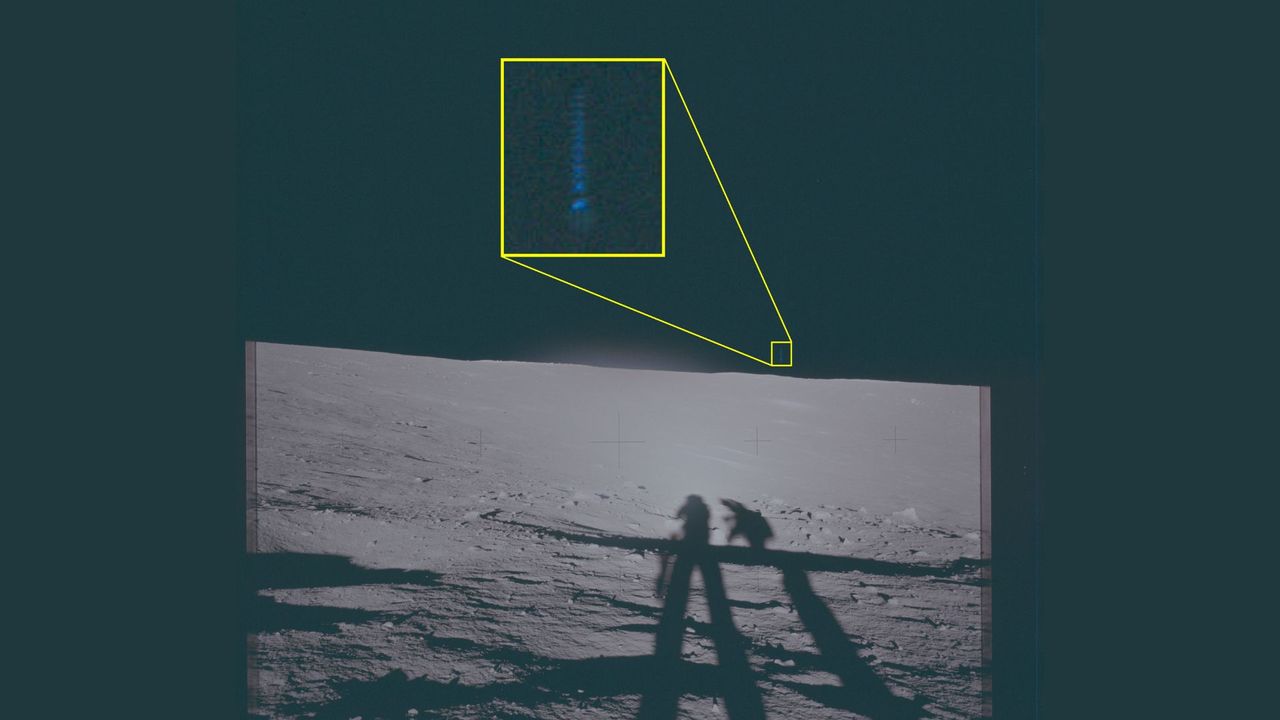
Media reports highlight several image numbers, such as AS12-68-6850 through AS12-68-6856. These frames were originally taken seconds apart and show a sequence of the lunar horizon. In those images, small, bright specs appear above the horizon that shift slightly between frames. To confirm you have the right images, cross‑reference the filenames with the Apollo 12 Mission Report (available on NASA’s Technical Reports Server). Look for any annotations about “unexplained lights” or “transient events.”
Step 3: Download the High-Resolution Versions
Most archives provide multiple resolutions. For best analysis, select the highest resolution available (often 4k or higher). Right‑click and choose “Save Image As…” to download each relevant frame. Keep the original file names intact so you can track the order—this will be important when comparing photos for motion or changes.
Step 4: Inspect Each Image in a Photo Viewer
Open the first image in your preferred viewer. Use the zoom tool to enlarge the area where the anomalous light appears (usually near the lunar horizon, not on the surface). Look for:
- Pixel structure: Are the lights composed of a single bright pixel cluster (possible camera artifact) or do they have distinct edges?
- Position relative to the lunar limb: Is the light above the moon’s disc, suggesting it could be in space, or does it seem attached to a surface feature?
Move through the sequence (Step 3) and note any changes in brightness, color, or position from one frame to the next. This will help you determine if the object moved or remained static.
Step 5: Enhance Contrast and Brightness to Reveal Hidden Details
Download a free image editor like GIMP (or use built‑in tools). Open one of the suspected anomaly frames. Go to Colors > Brightness‑Contrast and increase contrast by 30–50%. Then lower brightness slightly to darken the black sky. This technique often makes faint glints more visible. Alternatively, use Curves to stretch the histogram. Avoid over‑processing that could create false artifacts (like halo effects).
Step 6: Compare with Known Calibration or Dust‑Free Frames
Return to the LPI archive and download a few verification images taken immediately before or after your selected frames. For Apollo 12, look for frames that show only the lunar surface or blank sky with no reported lights. Open these in your editor alongside your anomaly images, side by side. If the “UFO” appears in only one or two frames, it may be a transient light (e.g., a reflection or a particle). If it appears in many frames but in slightly different spots, it might be a moving object.

Step 7: Read the Astronauts’ Account in the Apollo 12 Technical Debrief
To add context, read the transcript of the crew’s observations. A key source is the Apollo 12 Mission Report, Volume 2 – Operational Data, available on NASA’s History Division site. Conrad and Bean mentioned seeing “a bright flash” and “a small bright point” while on the surface. Compare your own inspection with their words—this helps differentiate between actual phenomena and later digital artifacts.
Step 8: Document Your Findings and Form a Hypothesis
Create a simple log with columns: Image ID, observed light location (x,y coordinates if using software), brightness (on a scale of 1–10), color, and movement (stationary, drifting, etc.). Write a short summary of what you think the lights could be—options include: sunlight reflecting off ejecta particles, lens flares from the camera’s glass, cosmic rays hitting the film, or actual atmospheric phenomena above the moon. There is no single accepted answer, and your analysis contributes to ongoing discussion.
Tips for Successful Analysis
- Work with RAW or TIFF versions if possible – Compressed JPEGs can lose subtle details. Some archives offer uncompressed masters.
- Use a consistent monitor calibration – Minimize screen glare and set brightness to a medium level so you don’t mistake screen reflections for real lights.
- Consult online forums – Communities like r/ApolloMoonPhotos or NASASpaceflight.com forums have threads dedicated to these declassified images. Share your observations – others might spot patterns you missed.
- Be skeptical of your own biases – It’s easy to see “UFOs” in dust motes. Always challenge each candidate with a “what else could this be?” test.
- Don’t overlook mission timeline – The Apollo 12 spacesuit radio logs show that Conrad and Bean were often moving during the photo sequences; camera movement can cause light streaks.
By following these steps, you’ll engage with a fascinating piece of lunar history preserved in declassified archives. Whether the lights turn out to be space debris, optical glitches, or something truly unexplained, your careful analysis keeps the spirit of citizen science alive—just as the Apollo astronauts once looked up and wondered.