Mastering 3D Scanning with the 3DMakerPro Toucan: A Step-by-Step Guide
Introduction
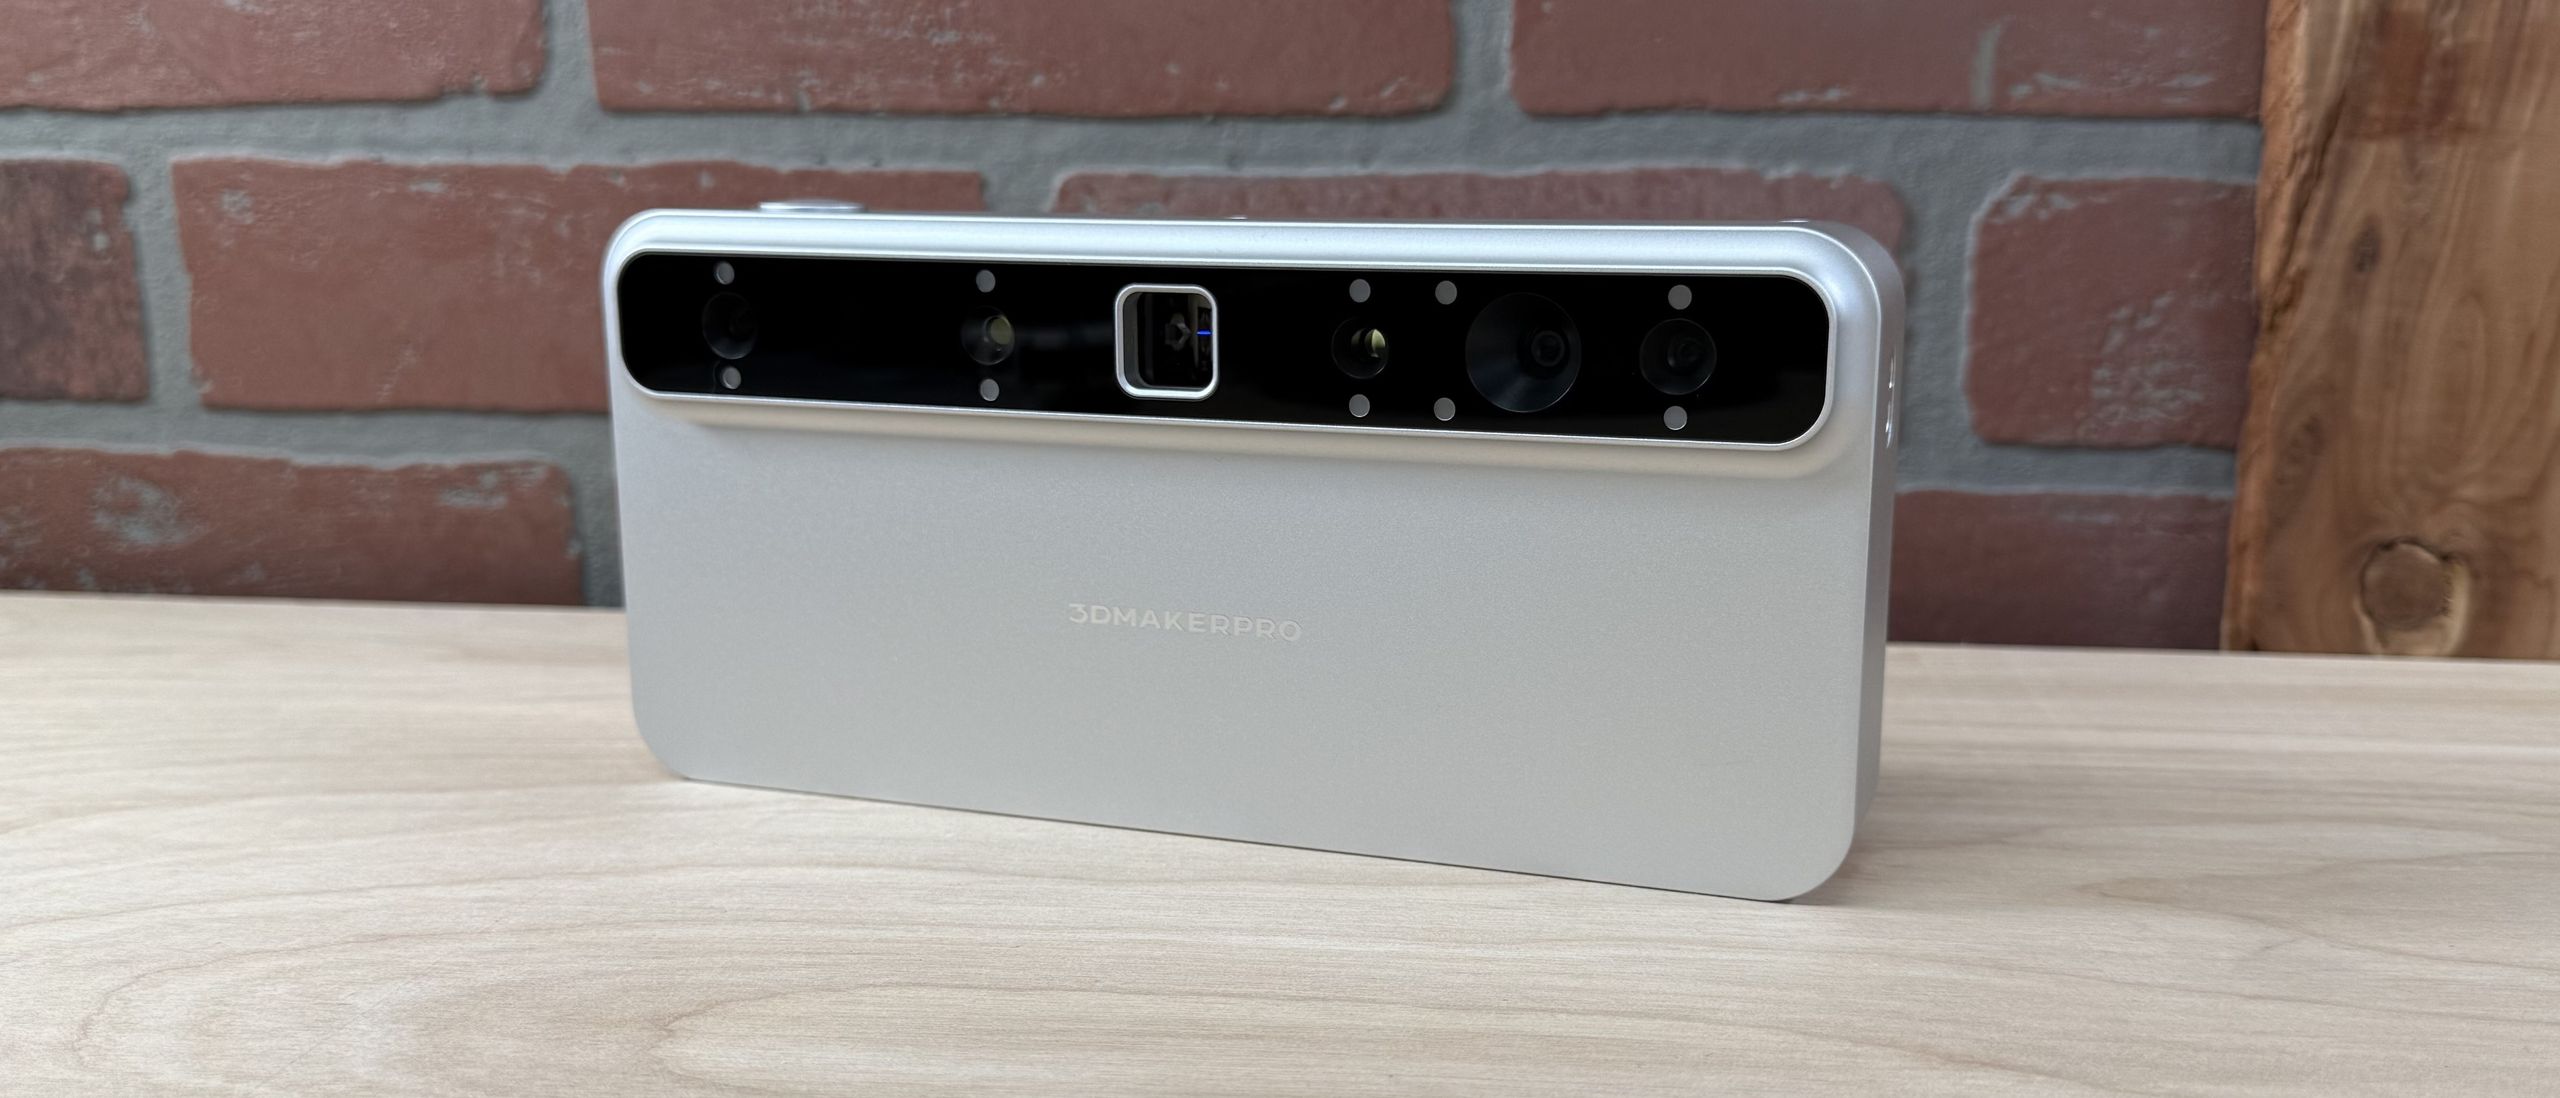
The 3DMakerPro Toucan is designed as a standalone 3D scanner, meaning you can capture point clouds, generate 3D models, and export them without ever connecting to a computer. Its robust hardware—complete with a Class 3R laser—delivers impressive detail at a rapid pace. However, as with any cutting-edge tool, you may encounter some software quirks, tracking loss, or inconsistent Wi-Fi exports. This guide walks you through each step, from setup to exporting your final model, while also offering practical advice to sidestep common pitfalls.
What You Need
- 3DMakerPro Toucan scanner (fully charged or connected to power via USB-C)
- Object to scan – a static item with moderate detail (avoid highly reflective or transparent surfaces without preparation)
- Stable surface or tripod – the scanner can be used handheld, but for best results, mount it securely
- Wi‑Fi network (2.4 GHz recommended) for wireless export to your smartphone, tablet, or computer
- Optional: Turntable – helps automate the scanning process for smaller objects
- Lighting – even, diffuse lighting helps the texture camera capture clearer colors
Step-by-Step Process
Step 1: Power On and Pair the Device
Press and hold the power button on the Toucan until the indicator light glows steady blue. If you plan to export wirelessly later, connect your mobile device or computer to the scanner’s own Wi‑Fi network (look for a network named “3DMakerPro_Toucan_xxxx” in your settings). Alternatively, you can use the scanner entirely offline and later transfer files via USB‑C.
Step 2: Prepare Your Scanning Environment
Place your object on a stable surface with minimal movement. If you’re using a turntable, align the object at the center. Ensure consistent lighting and avoid direct sunlight, which can interfere with the laser and cause tracking errors. For the best texture quality, use diffuse light sources and avoid harsh shadows.
Step 3: Launch the Scanning App
Open the 3DMakerPro app on your paired device (available for iOS and Android). The app automatically detects the Toucan once you’re connected to its Wi‑Fi. If the connection fails, toggle airplane mode on your device, reconnect, and relaunch the app. Note: The software is still being refined—some users report occasional crashes or delayed initialisation. Patience and a fresh restart usually solve it.
Step 4: Choose Your Scanning Mode
The Toucan offers several modes. For most objects, select “Object Mode” (handheld or fixed). If you have a small, symmetrical item, try the “Turntable Mode” to let the scanner rotate automatically. For larger scenes, use “Room Mode”. The Class 3R laser is powerful but safe when handled responsibly—always avoid pointing it at eyes or reflective surfaces directly.
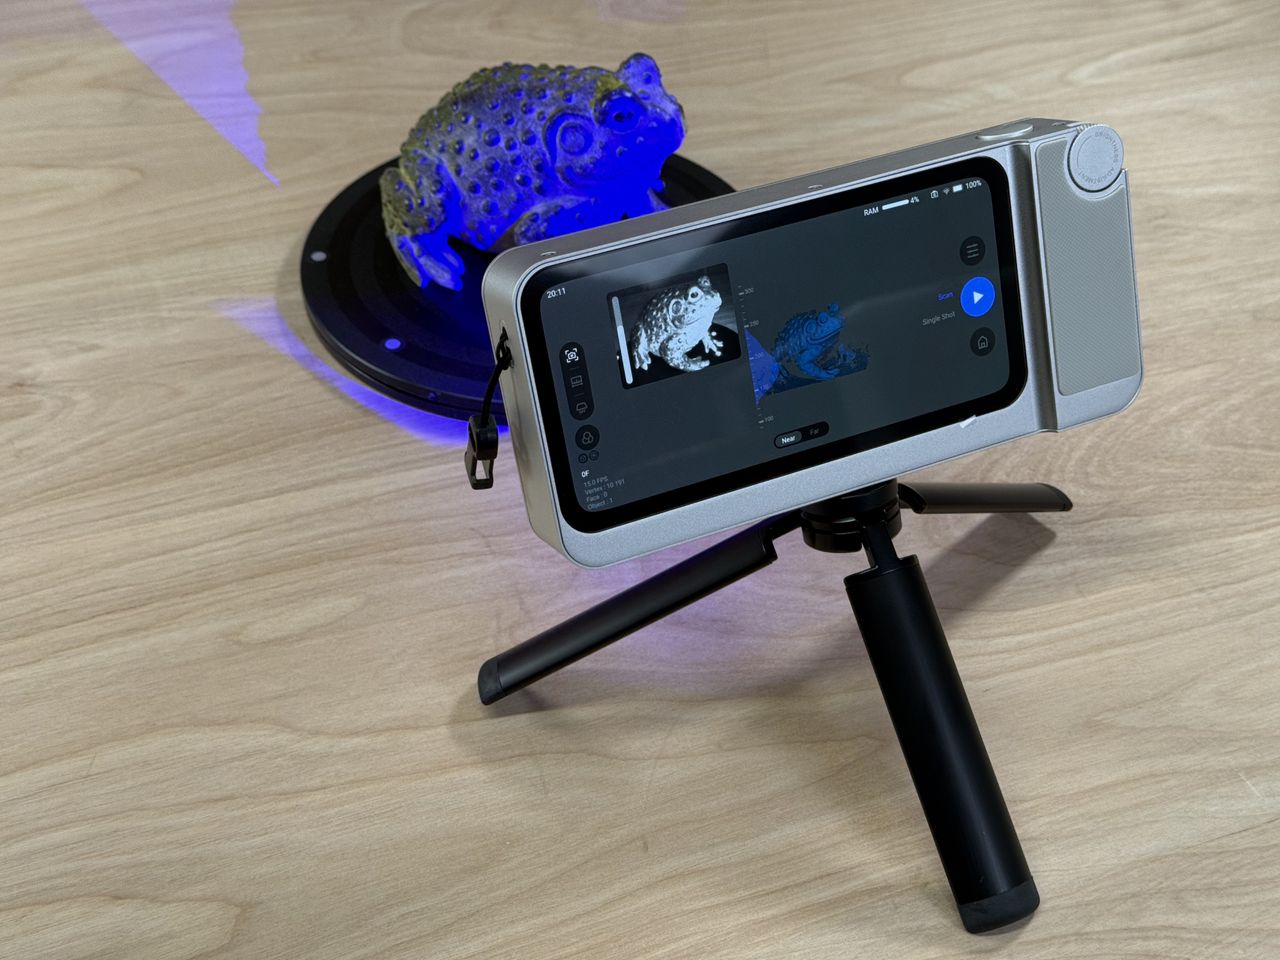
Step 5: Position the Scanner and Begin Capture
Hold the Toucan steady about 15–50 cm from your object (the recommended distance is shown in the app). Gently press the trigger button to start capturing. Move the scanner slowly and deliberately around the object, maintaining consistent distance and angle. If you notice tracking loss (the point cloud jumps or freezes), pause and re‑align the scanner with a previously scanned region. The software may struggle if you move too fast or rotate too sharply.
Step 6: Monitor the Point Cloud and Refine
As you scan, the app displays a real-time point cloud. Look for holes or gaps where the laser couldn’t reach (e.g., undercuts or deep crevices). To fill these, carefully reposition the scanner to capture the missing areas. You can also use the app’s “Refine” function after the scan to automatically fill small gaps, though it may reduce overall accuracy on complex geometry.
Step 7: Finalise the 3D Model
Once you’re satisfied with the coverage, tap the “Finish” button in the app. The Toucan processes the raw data on‑board—this can take a few seconds to a few minutes depending on the model’s complexity. You’ll then see a preview of the textured 3D model. Tip: The built-in texture camera sometimes produces blurry or washed-out colours. For sharper textures, consider scanning without texture and applying photographs later with third‑party software.
Step 8: Export Your Model
You have two export options:
- Wi‑Fi export: Tap the share icon and select “Export via Wi‑Fi”. The model will be sent as an OBJ or STL file to your connected device. Note: This feature can be inconsistent—some transfers fail or time out. If you encounter issues, try moving the scanner closer to your device and ensure no other networks are interfering.
- USB‑C export: For a more reliable transfer, connect the Toucan directly to your computer using a USB‑C cable. The scanner appears as an external drive. Copy the model files (point cloud, mesh, and optionally texture) to your computer. This method also bypasses Wi‑Fi glitches.
Step 9: Post‑Processing (Optional but Recommended)
Even after export, the model may require cleaning. Import the OBJ/STL into software like MeshLab, Blender, or Fusion 360. Repair mesh holes, smooth noisy areas, and re‑apply textures if the built‑in ones were too blurry. This step compensates for the Toucan’s software limitations and elevates the final output to professional quality.
Tips and Best Practices
- Track carefully: Because tracking loss is common, scan in a single, fluid motion and avoid sudden changes in direction. If you lose tracking, move back to a previously scanned section and slowly re‑acquire.
- Texture is tricky: The Toucan’s texture camera may yield soft or uneven results. For colour-critical work, scan without texture and use a separate high‑resolution camera to map imagery onto your mesh later.
- Wi‑Fi vs. USB: Whenever possible, use USB‑C for export. It’s faster and more dependable than wireless, which can suffer from dropouts or slow speeds.
- Software updates: The manufacturer frequently releases firmware and app updates. Always check for the latest version before starting a scan—many bugs, including tracking issues, are addressed in newer releases.
- Reflective surfaces: Avoid shiny, transparent, or very dark objects. Spray the object with a temporary matte coating (e.g., scanning spray or dry shampoo) to improve laser capture.
- Battery management: The scanner’s battery lasts roughly two hours. For longer sessions, keep the USB‑C power adapter plugged in to avoid running out mid‑scan.
- Practice makes perfect: Like any precision tool, the Toucan rewards patient, deliberate use. Start with simple geometric objects to build confidence before moving to complex shapes.